


This walkthrough shows you how to link WebInput for date range selection.
During this walkthrough, you will learn how to do the following:
- Use WebInput.NET Wizard to set WebInput's behavior.
 Prerequisites
In order to complete this walkthrough, you will need the following:
- Visual Studio 2008 Application.
Step-By-Step Instructions
To create linked input
- Walkthrough: Creating masked DateTime input using Wizard (Create two WebInput control that are using masked DateTime Input).
- Assume that the 1st WebInput's ID is WebInput1 and the 2nd one is WebInput2.
- Right-click on WebInput1 control and choose Properties.
- In Properties box, expand DateTimeEditor.
- Set IsEnabled to True in order to activate the DateTimeEditor feature.
- Set DateInputLink to ctl00_content_WebInput2. (This is the client id of WebInput2).
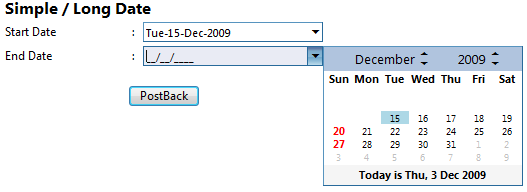
- Save and run the project. WebInput will automatically assign the linked WebInput control as the end date which should have greater value then the start date.
 See Also
Tasks
{Walkthrough Topics}
{FAQ and How-to Topics}
Other Resources
{Linked Data Input}